package com.softtech.kismiss.model;
import com.softtech.kismiss.property.Header;
import com.softtech.kismiss.property.Kismiss;
import com.softtech.kismiss.property.Property;
/**
* @author Kisman Hong
* test Kismiss Reports
*/
@Kismiss(name = "Employee")
@Header
@Detail(lineWidth=0.5)
public class Employee {
private Integer id;
private String lastName;
private String firstName;
private String address;
private String phoneNumber;
private String postCode;
private String division;
private double salary;
private int capacity;
@Property(width = 45, position = 4)
public String getDivision() {
return division;
}
public void setDivision(String division) {
this.division = division;
}
@Property(width = 45, position = 5)
public String getPhoneNumber() {
return phoneNumber;
}
public void setPhoneNumber(String phoneNumber) {
this.phoneNumber = phoneNumber;
}
@Property(width = 50, position = 6)
public String getPostCode() {
return postCode;
}
public void setPostCode(String postCode) {
this.postCode = postCode;
}
@Property(width = 100, position = 2)
public String getAddress() {
return address;
}
public void setAddress(String address) {
this.address = address;
}
@Property(width = 100, position = 0)
public String getFirstName() {
return firstName;
}
public void setFirstName(String firstName) {
this.firstName = firstName;
}
@Property(width = 100, position = 1)
public String getLastName() {
return lastName;
}
public void setLastName(String lastName) {
this.lastName = lastName;
}
@Property(width = 45, position = 3)
public double getSalary() {
return salary;
}
public void setSalary(double salary) {
this.salary = salary;
}
@Property(width = 35, position = 7)
public int getCapacity() {
return capacity;
}
public void setCapacity(int capacity) {
this.capacity = capacity;
}
public Integer getId() {
return id;
}
public void setId(Integer id) {
this.id = id;
}
}
You can see that this class uses standard JavaBean naming conventions for property getter and setter methods, as well as private visibility for the fields. This is a recommended design.
Kismiss-reports properties are defined at JavaBean class. Let's see “Employee.java” for more detail :
Now, we will write some java code to fill the report data and generate Employee report :
public class ReportTestEmployee {
private static List<Name> names = new ArrayList<Name>();
public static void main(String args[]) throws Exception
{
Random random = new Random();
List<Employee> employees = new ArrayList<Employee>();
for(int i=0; i < 1000; i++) {
Employee employee = new Employee();
String[] name = produceName();
employee.setAddress("Sudirman Rd., Jakarta Pusat");
employee.setDivision("Marketing");
employee.setFirstName(name[0]);
employee.setLastName(name[1]);
employee.setPhoneNumber(producePhone());
employee.setPostCode(producePostCode());
employee.setSalary(produceSalary());
employee.setCapacity(random.nextInt(1000));
employees.add(employee);
}
for(int i=0; i < 1000; i++) {
Employee employee = new Employee();
String[] name = produceName();
employee.setAddress("Gajah Mada Rd.");
employee.setDivision("HRD");
employee.setFirstName(name[0]);
employee.setLastName(name[1]);
employee.setPhoneNumber(producePhone());
employee.setPostCode(producePostCode());
employee.setSalary(produceSalary());
employee.setCapacity(random.nextInt(1000));
employees.add(employee);
}
KismissReport report = KismissReport.getInstance(); //(1)
HashMap<String, Object> params = new HashMap<String, Object>(); //(2)
params.put(ReportFactory.TITLE, "TEST KISMISS REPORT"); //(3)
params.put(ReportFactory.REPORT_NAME, "employeeTest.pdf"); //(4)
report.generateAnnotatedPdfFiles(Employee.class, employees, "D:/Personal/Test/", params); //(5)
}
}
Let us see step by step :
initialize kismiss report instance
declare the report params to be included
defining title of report
give report file name
generate report
The code above is quite simple. We do not need a long code to generate the report. Prepare the data then call the generate method function.
The generateAnnotatedPdfFiles method has four parameters :
the JavaBean class that will be generated, in this example : “Employee.class”.
collection data of class, this is the content of report.
path where the pdf file will be generated.
the params of report, such as title, report file name, etc.
After finishing the following steps above, let us see the report result :

We can prevent overflow by setting the attribute isStretchWithOverflow of “Property”. By default, isStretchWithOverflow is set to true, we can modify to false or change the field to smaller font. When isStretchWithOverflow is false, data of the Address, Salary or Phone Number field will not be shown completely. Let us set isStretchWithOverflow of Address to false, Our “getAddress” method will look like :
@Property(width = 100, position = 2, isStretchWithOverflow=false)
public String getAddress() {
return address;
}
The data of Address field do not show completely because of isStretchWithOverflow of “getAddress” method is set to false. We give a fix width for this field. To show the data completely we can set font to be smaller by using “fontSize”. We will set fontSize of the Address, Salary , and Phone Number field. Our “getAddress”, “getSalary”, and “getPhoneNumber” methods will look like :
@Property(width = 100, position = 2, isStretchWithOverflow=false, fontSize=7)
public String getAddress() {
return address;
}
@Property(width = 45, position = 3, isStretchWithOverflow=false, fontSize=7)
public double getSalary() {
return salary;
}
@Property(width = 45, position = 5, isStretchWithOverflow=false, fontSize=6)
public String getPhoneNumber() {
return phoneNumber;
}
Once again, look at report result below :
The data of Address and Phone Number fields are shown completely, the Salary field is not. Data of salary is too long, so we need to increase the width of salary field.
Another thing that can be added to this report is “row number”. We can use “getId” method as row number. By adding row number field, we must increase the position of all the field :
@Property(name = "No", width = 15, position = 0)
@RecordNumber
public Integer getId() {
return id;
}
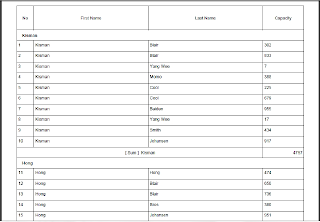
The attribute “@RecordNumber” tell us that the field is used to be row number. Then the result shown like :


